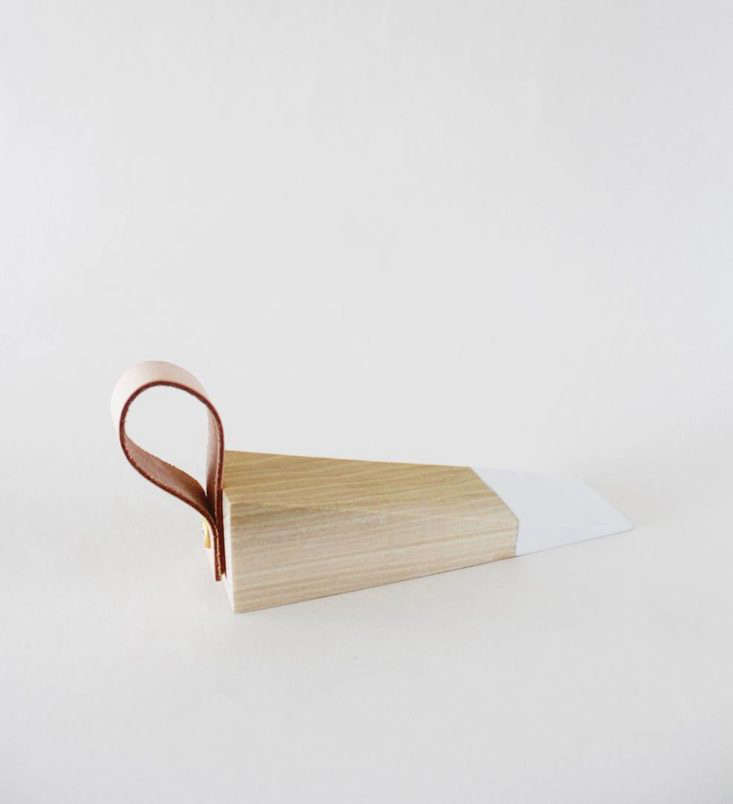
DIY: A Leather-Detailed Wooden Doorstop
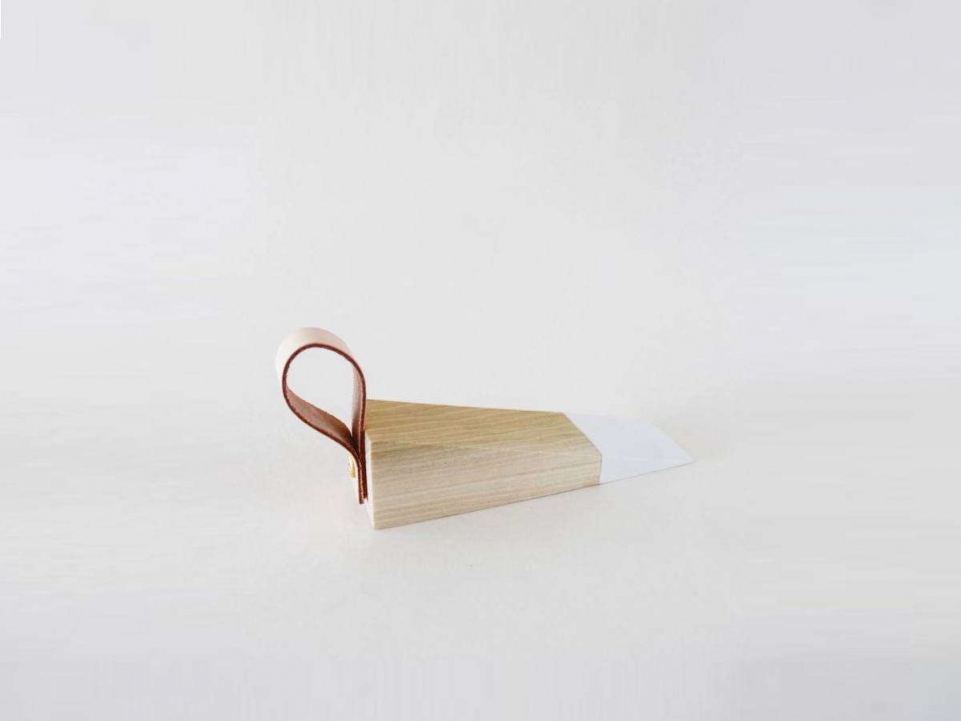
There’s no need to get fancy when it comes to propping open a door, but a wedge of wood is so much nicer than a mood-killing piece of plastic or rubber. Years ago, my mother returned from a trip to London with a traditional English turned oak doorstop made by David Linley, aka “the royal carpenter.” We have used his handiwork daily ever since, so I was delighted to come across its raffish American-made counterpart: a DIY door wedge created by Anna of Annabode & Co. for Home Made by Carmona. May it open doors for you.
Project and photography courtesy of Home Made by Carmona.
Materials
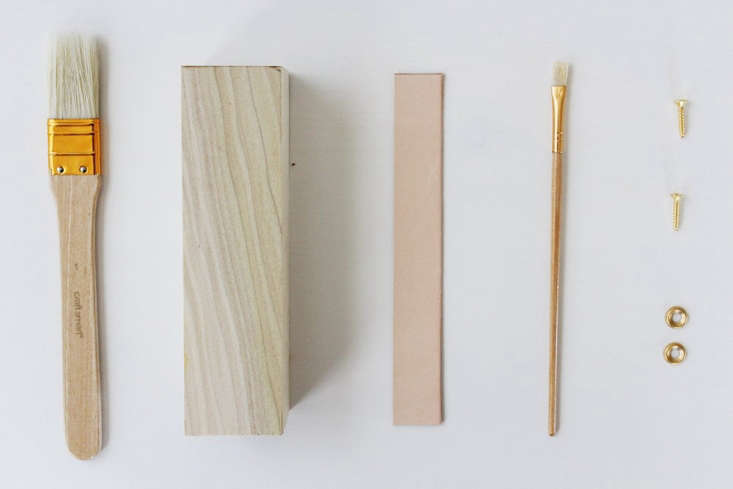
- Piece of wood approximately 1.5 inches wide and 6.5 inches long. Use scrap wood or buy a length of wood, such as Home Depot’s Poplar Hobby Board; $5.34 for three feet (enough to make several doorstops).
- Length of leather, 1/2 inch wide and five inches long. Consider cutting up an old belt.
- Saw. “Use whatever kind of saw you have on hand,” says Anna.
- Sandpaper
- Drill
- Pencil and ruler
- High-gloss white paint
- Minwax Polycrylic, a protective finish.
- Paintbrushes
- One No. 6 brass washer. Home Depot sells five-packs of Brass Finishing Washers for $1.18.
- One No. 6 brass flathead screw. Home Depot sells four-packs of 6 3/4 inch Phillips Flat-Head Wood Screws for $1.18.
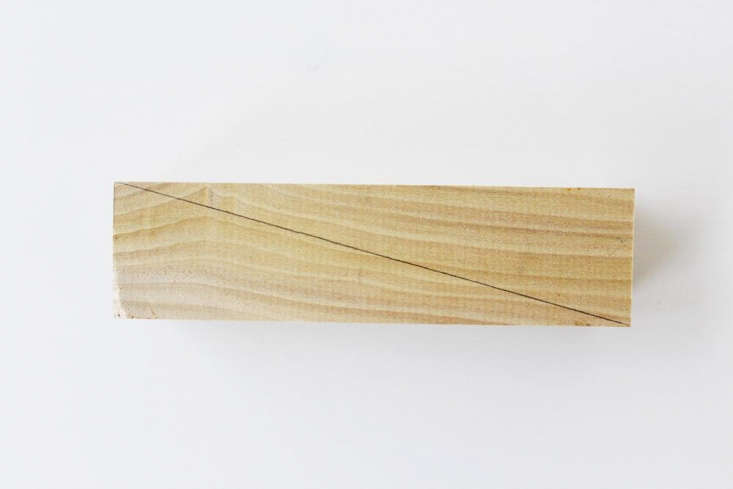
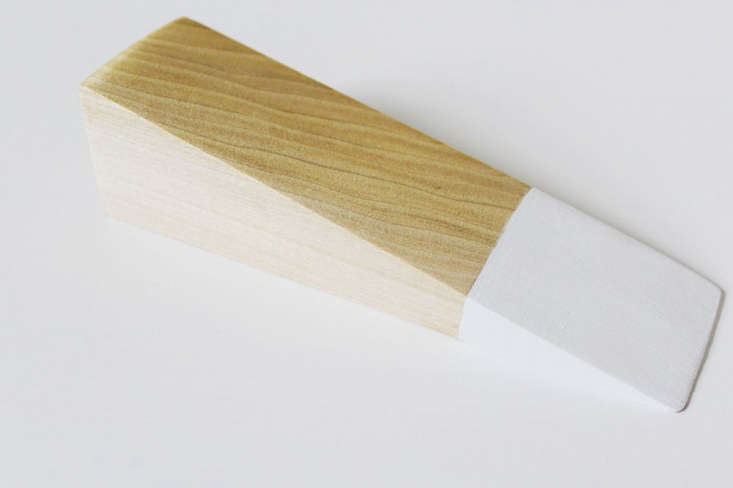
Instructions
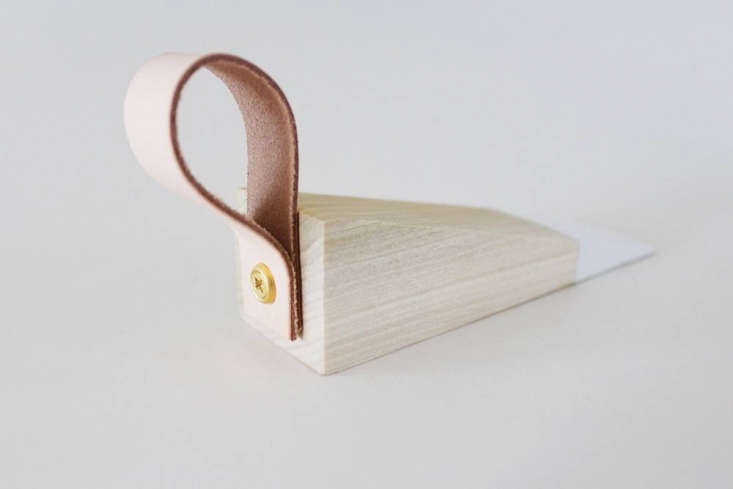
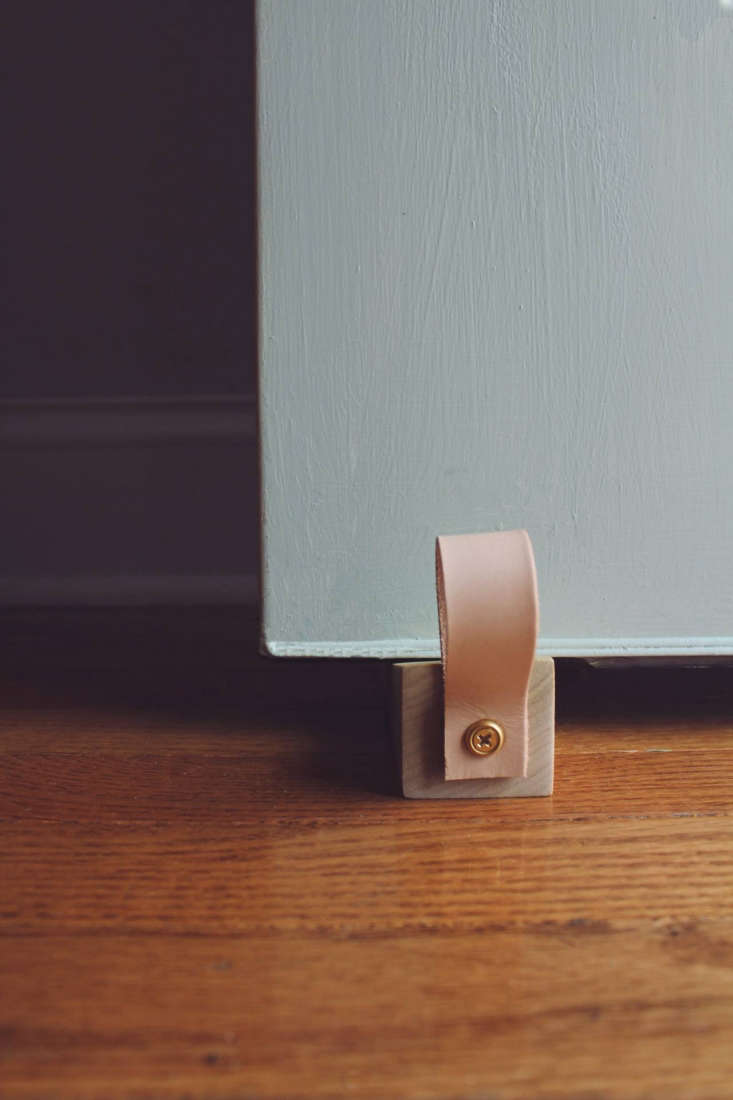
The Finished Look
Keep creating. Here are three more DIY projects perfect for tackling in a weekend:
N.B. This post is an update; the original story ran on May 16, 2017.
(Visited 464 times, 7 visits today)